
- Training
- Service
- Promotion
- Schedule
- Testing Center
- News
- Contact
2/18/2022


Using Power Automate, you can easily automate day-to-day tasks or build repetitive tasks in SharePoint that help you stay productive.
In this tutorial, you will create a flow that sends an email when a new item is added in a SharePoint list.
Before proceeding with these instructions, make sure your SharePoint site is set up with the required lists and libraries.
1. Create Projects list
Create a new SharePoint list called Projects. To create a new SharePoint list, follow these steps.
1. In your Microsoft 365 tenant, browse to a modern SharePoint site.
2. In the command bar, select New > List.
3. In the Create list panel, enter the following:
Name: Projects
4. To create the list, select Create.
You are automatically redirected to the Projects list.
5. Select + Add column, and to add an Owner column to the list, and then select the Person column type.
6. In the Create a column panel, enter the following:
Name: Owner
Description: Project owner
7. To add the column to the Projects list, select Save. The new Owner column becomes available in the Projects list.
In the List command bar, select New, and add the following list items:
2. Create a flow using Power Automate
1. In your SharePoint site, browse to the Projects list.
2. To create and manage flows for a list or a library, from the command bar, on the list or library page, select Integrate > Power Automate. Selecting Power Automate expands to show you more options:
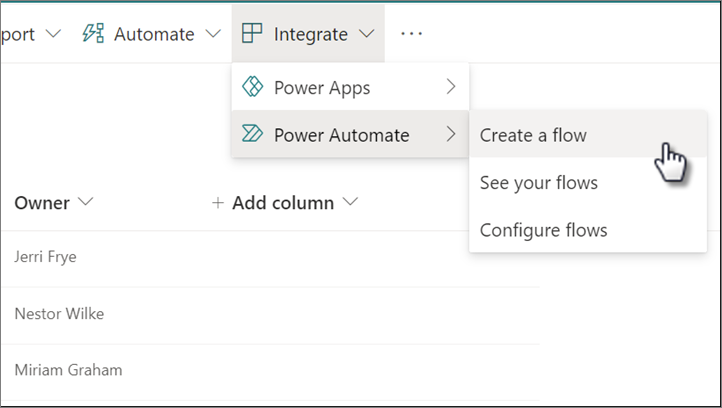
Note
If they are available for the list or library here, you may see other options on the Automate menu, such as Set a reminder and other flows.
3. Select Create a flow. In the Create a flow panel, you can explore various templates available for your list.
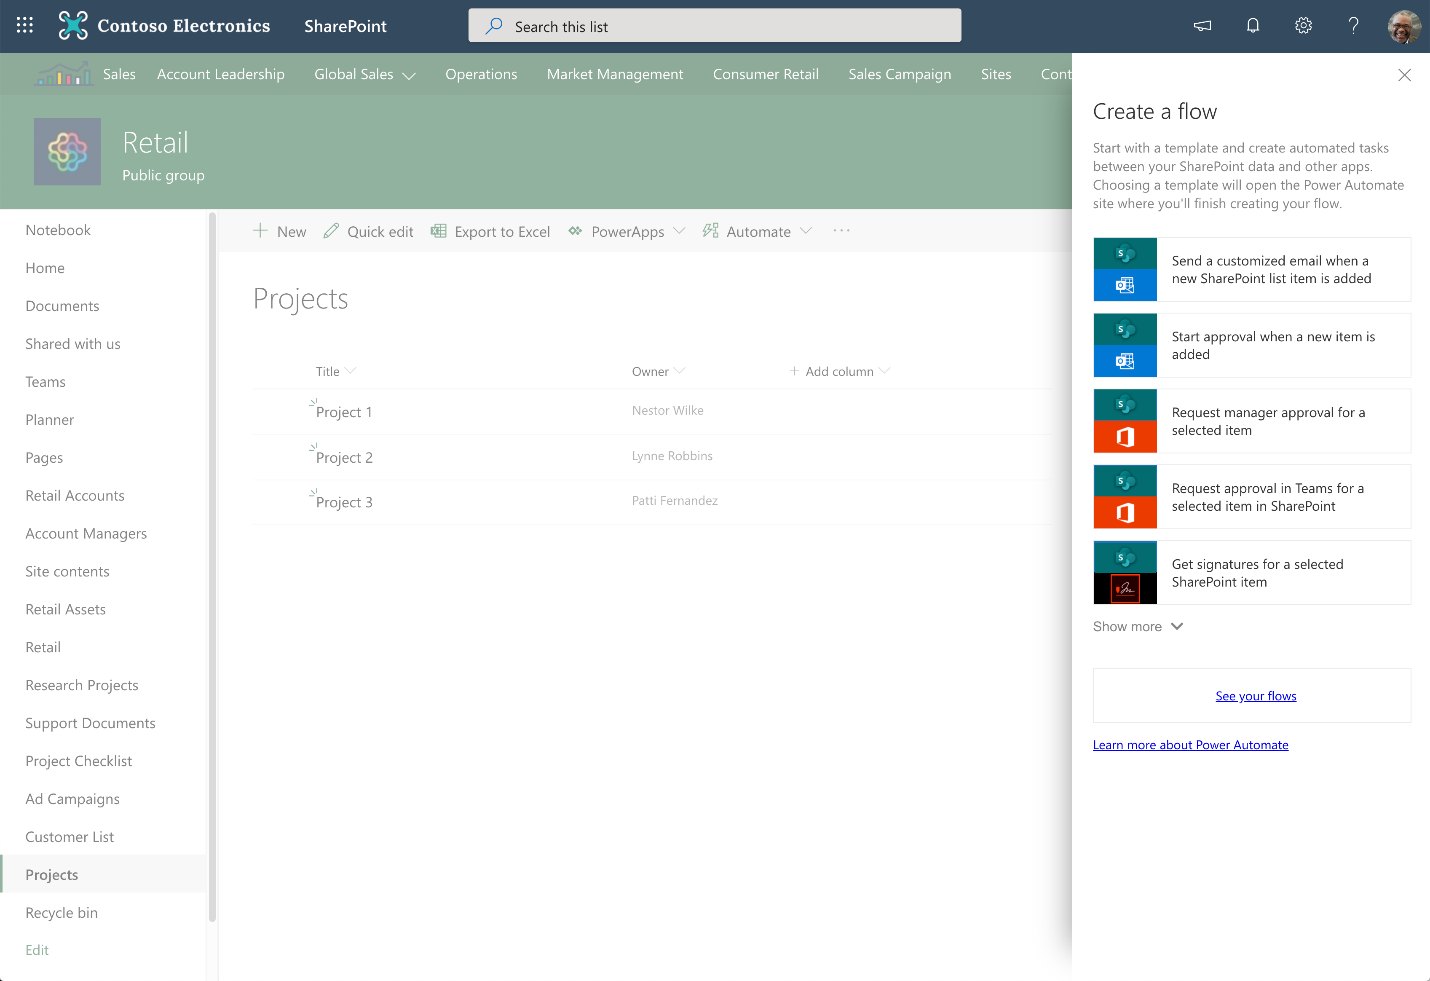
4. Select the template that reads:
Note
Send a customized email when a new SharePoint list item is added.
On a new browser tab, the Power Automate website appears and displays:
5. Using the dropdowns, verify the connection information (SharePoint Site Address and SharePoint List Name) is accurate to ensure it uses your credentials.
Note
A green checkmark icon indicates a connection to the service was successfully made using your credentials.
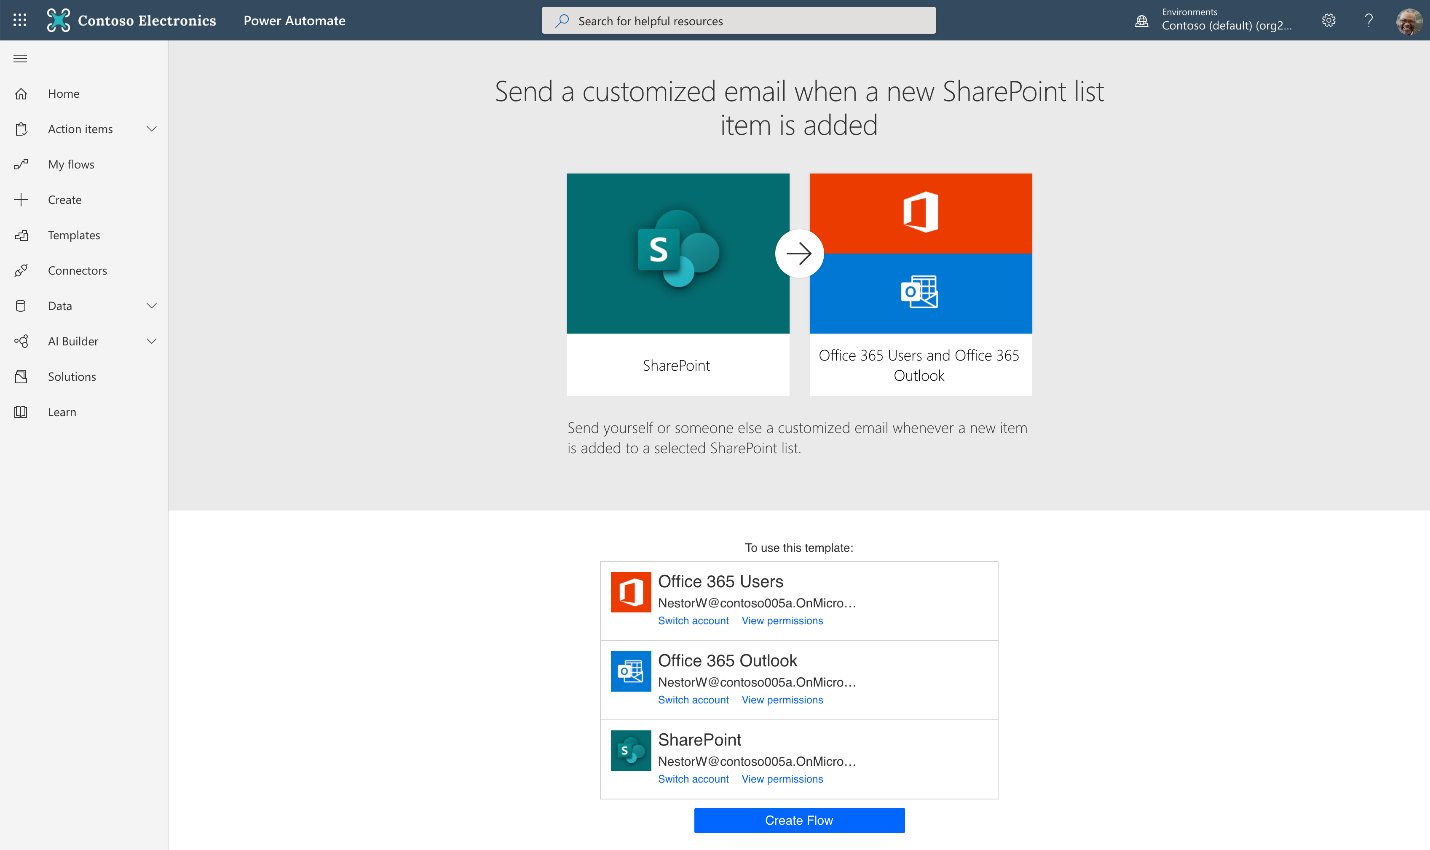
6. To create the flow, select Create Flow. Any connections that require a connection are also attempted during this step. After you successfully create the flow, the flow details page appears where you can edit and modify the flow, if needed.
Note
In this case, this flow that sends an email when new items are added to the list is now active and runs whenever new items are added to the Projects list in the specified SharePoint site.
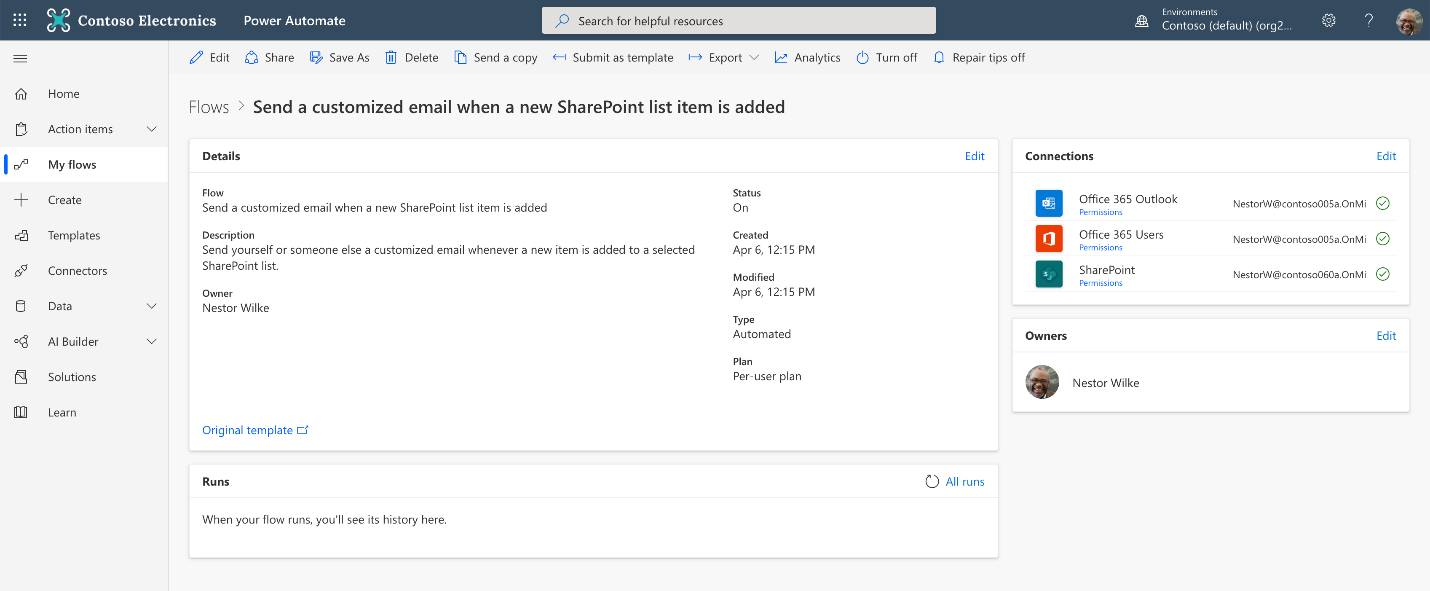
7. Click Edit in the top command bar to edit the flow in the flow designer.
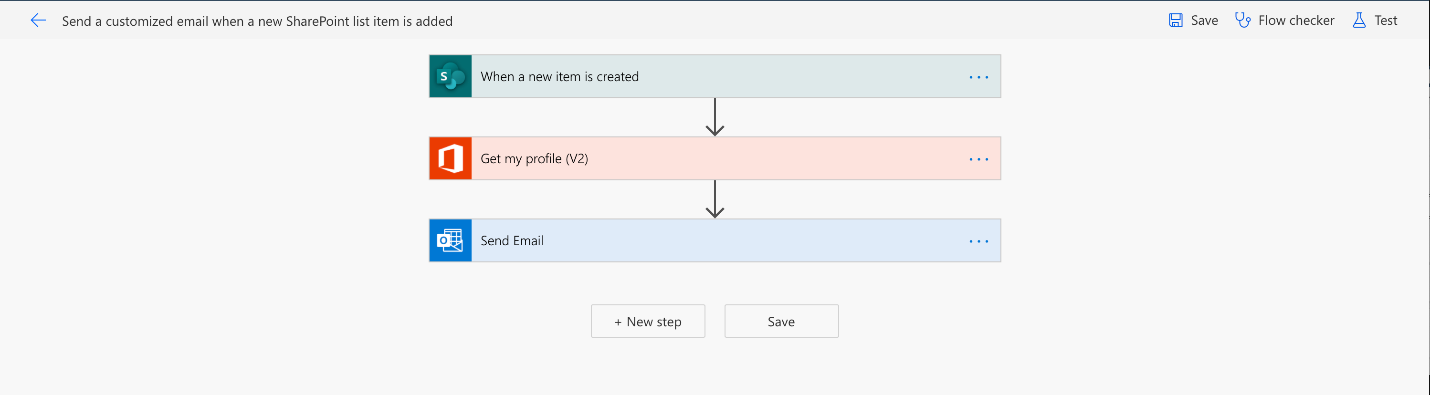
8. To expand and view the configured properties, select the When the new item is created trigger. Note the input configured to the SharePoint site address and list name from where you created the flow.
9. In the Send Email action, to expand the action, select Edit. All the input is filled in with dynamic values from the Get my profile and When the new item is created actions.
10. Hover over the dynamic values to see what properties they reference. For example, hovering over Email shows that the property is read from the Mail property in Get my profile.
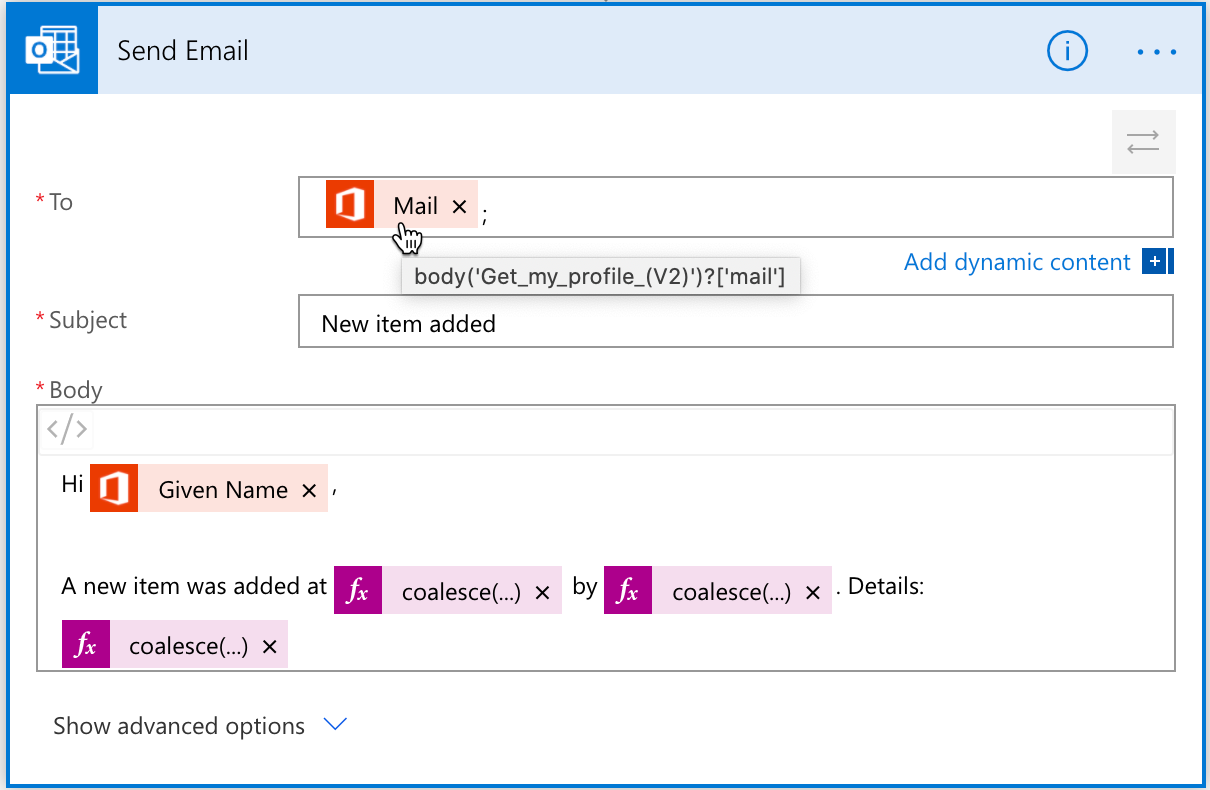
11. To save the flow, select Save.
3. Test your flow
To test your flow, either add a new item in SharePoint list by adding a new item, or initiate the test run directly from the flow designer. To test the flow from the designer, follow these steps. Testing the flow from the designer helps you to quickly see the flow run as the flow is executed.
1. In the flow designer, on the top command bar, select Test.
2. In the Test Flow panel, select I'll perform the trigger action, and then select Save & Test.
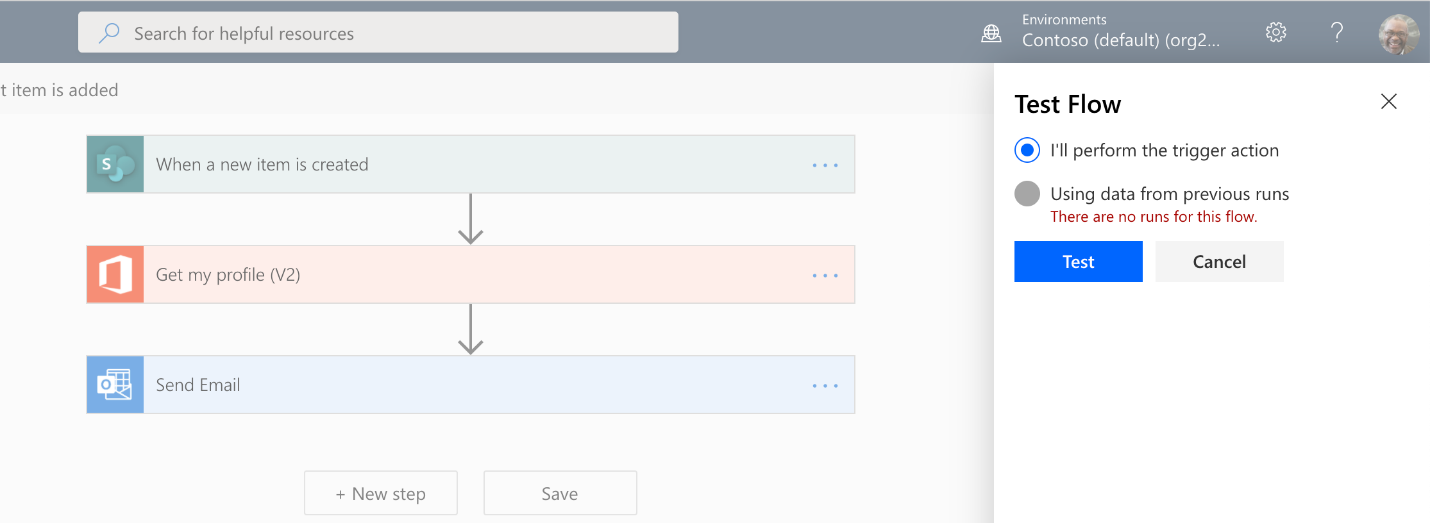
A message appears instructing you to add a new list item to the SharePoint list you selected.

3. You should have the browser tab with the Projects list opened already. If not, open a new browser tab, and browse to the Projects list.
Note
Do not close the flow designer. Make sure you keep the flow designer browser tab open.
4. In the Projects list, on the command bar, select New, and add the following items, and then select Save:
5. Switch to the flow designer tab. The flow run history appears. If all of your actions were executed successfully, a green checkmark icon appears aside every action.
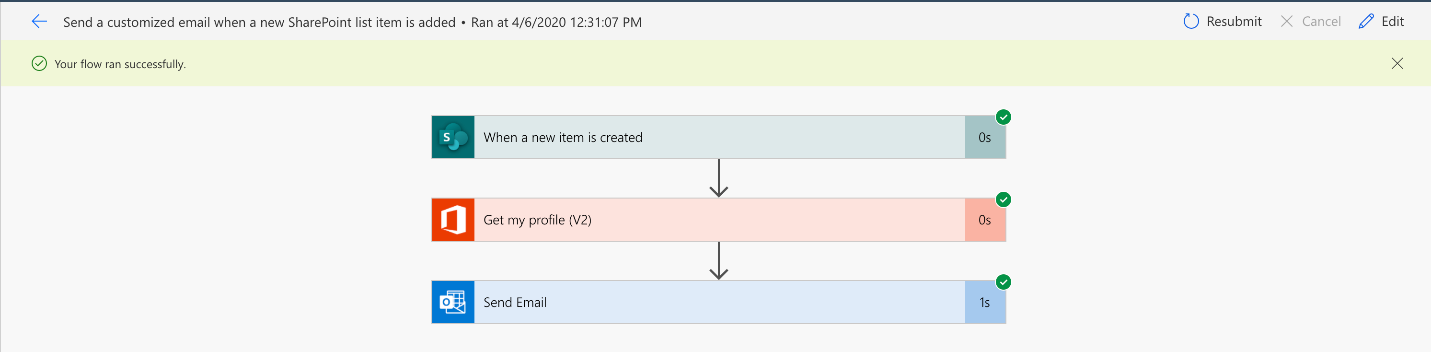
6. Select the action to see the inputs and outputs used in the flow run. This is also a good place to see the actual values translated from those dynamic content properties used in that action.
As a result of this flow, you receive an email regarding the new project information.
4. Modify your flow
1. In the flow designer, to edit your flow, select Edit.
2. Select the Send Email action.
3. In the Body input, after the Name dynamic property, append the following string:
4. While you are still editing the Body input, note the dynamic content list that appears aside the action.
5. In the dynamic content list, select values from the actions in your flow, (for example, in the When the new item is created trigger, the project owner information is available.
6. To add the owner information, in the dynamic content list, in the search box, search for owner.
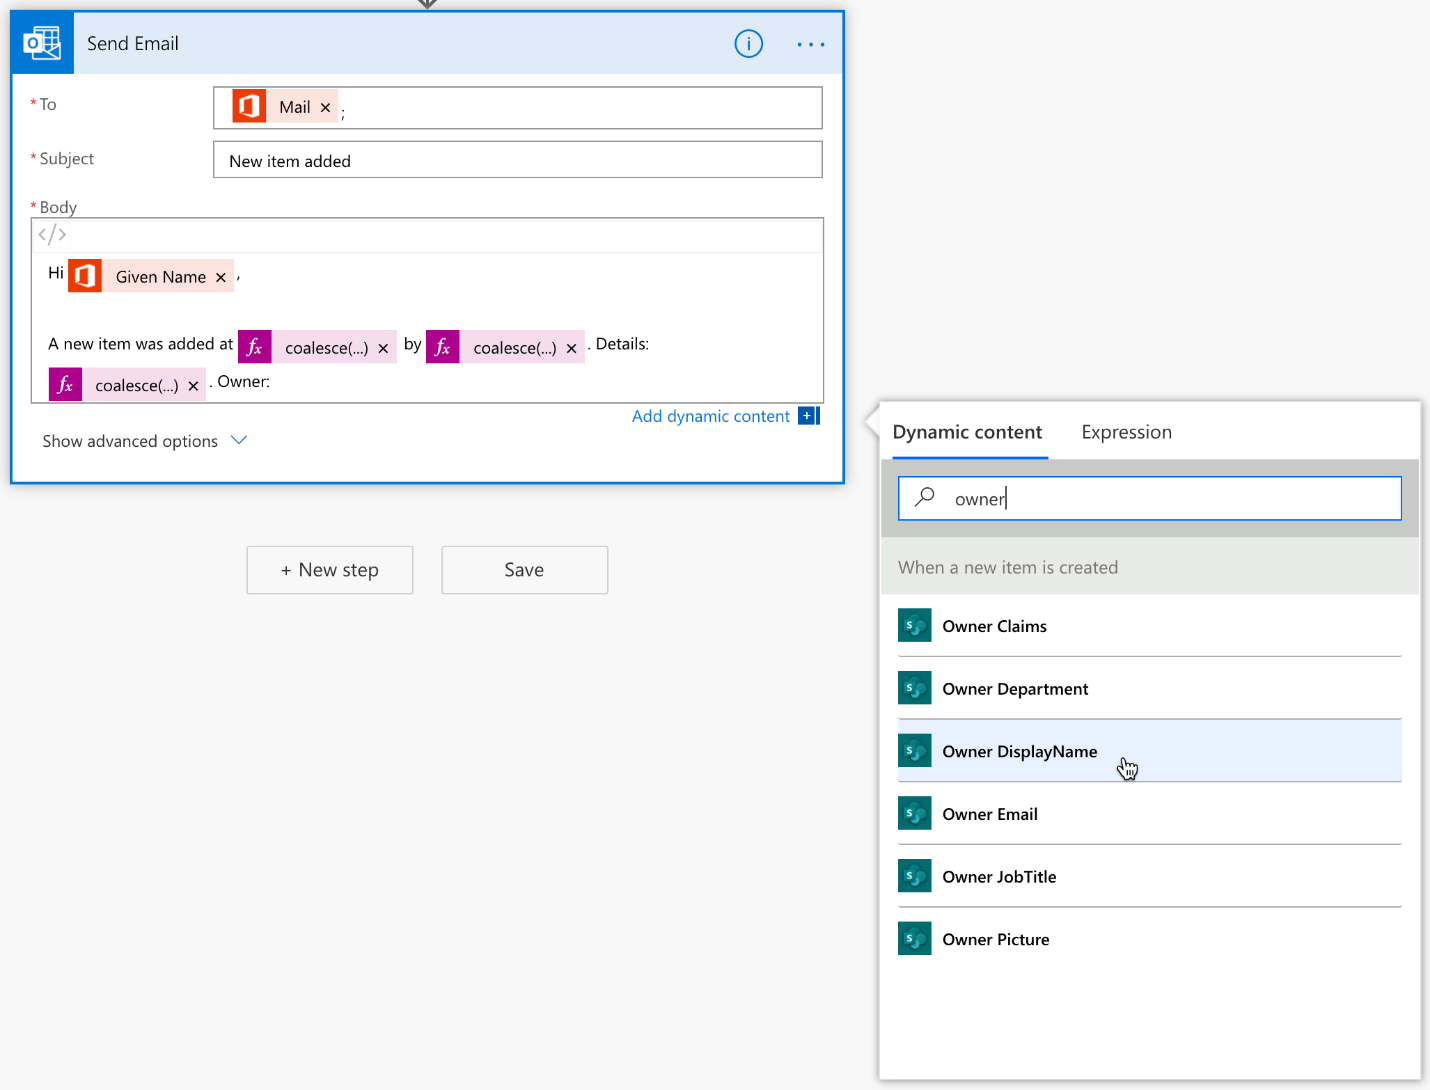
7. In the results, select Owner DisplayName. As you can see, it also displays other information, such as email, job title, picture and more. Because the Owner is a person column in SharePoint, SharePoint passes along the person details as individual properties to the flow.
The modified Body input appears like this with the included Owner info.
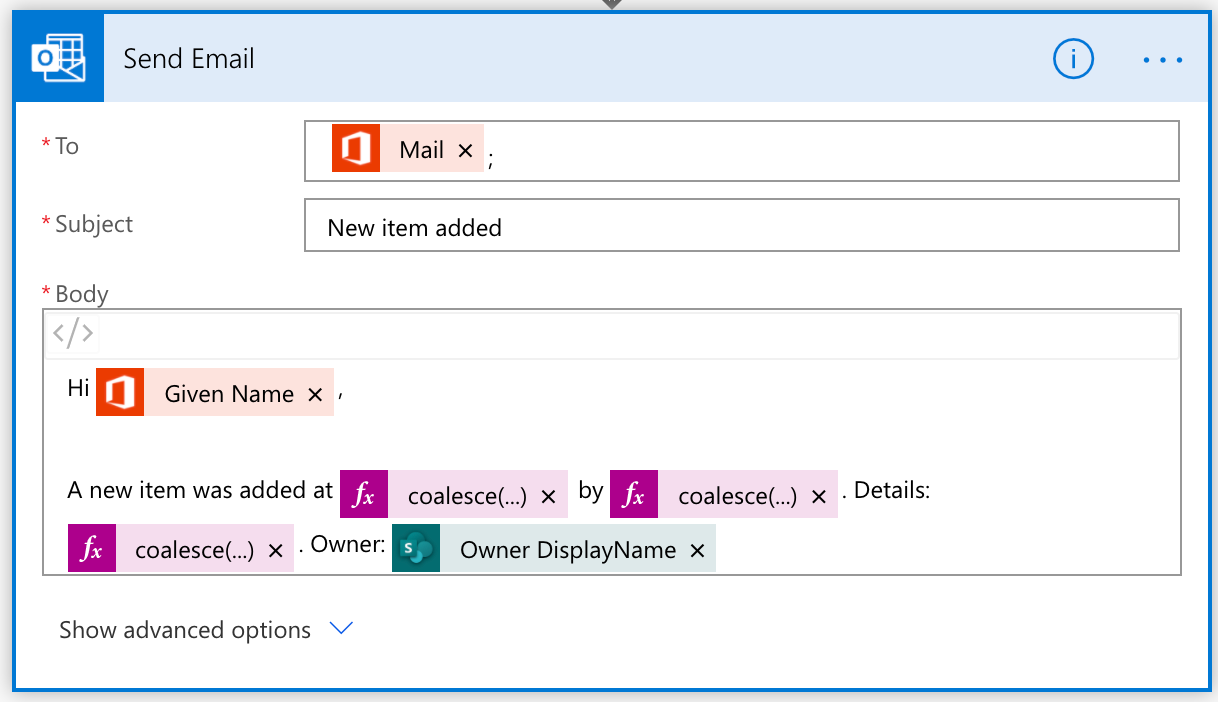
8. To test the flow, repeat these steps.
You receive an email with the updated owner information in it.
Source: docs.microsoft.com
See more
Training Course: Microsoft Power Automate

12/11/2025


