
- Training
- Service
- Promotion
- Schedule
- Testing Center
- News
- Contact
4/19/2022


Bottom line: This quick tip will save you a lot of time when deleting rows from a filtered range or table in Excel. Learn how to prevent Excel from freezing or crashing when deleting rows.
Skill level: Beginner
Has your computer ever started smoking after you attempted to delete rows from a large filtered range? 🙂
Or maybe you have to sit around and watch the wait cursor spin, not sure if Excel is going to come out of “Not Responding” mode, while the rows are deleted…
Even worse, sometimes Excel freezes or crashes when you attempt to delete rows.
Why does this happen?
Well, deleting rows on a filtered range can be a very labor intensive process for Excel. If the data is not sorted then Excel has to go through each set of visible rows and delete the row sections one by one.
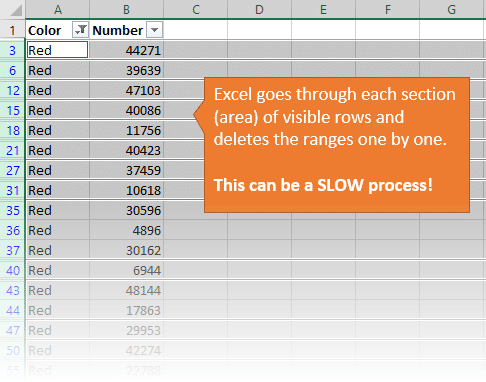
This process takes longer with larger data sets that contain more rows, columns, and formulas. Excel will sometimes enter Not Responding mode. We refer to this as “freezing”, but it actually causes the computer to heat up and work harder…
For this example I created a very simple data set that has two columns. The first column contains a color (Red, Blue, or Green), and the second column contains a random number.
There are 10,000 rows of data and the Color column is NOT sorted.
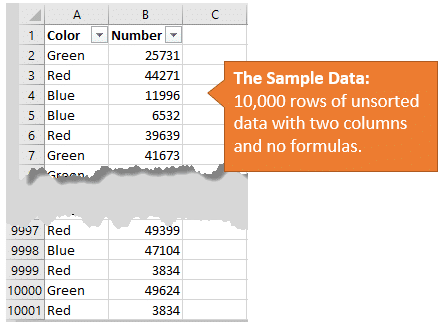
Let's say we want to delete the rows that contain “Red” in the Color column.
If we filter the range for Red only, then delete the rows, the process takes about… 8-10 seconds!
Excel does enter “Not Responding” (freezing) mode for a few seconds too, which is always scary. It may be faster or slower on your computer, but this is a very simple data set with no formulas.
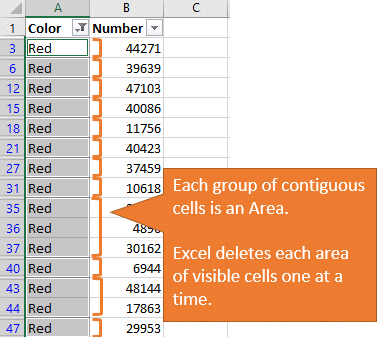
The unsorted data creates a series of non-contiguous ranges for the visible rows. These non-contiguous ranges are known as areas in VBA. We can determine how many areas we have in the filtered range by selecting all the cells in the first column of the data set, then running the following line of code in the Immediate Window of the VB Editor.
?Selection.SpecialCells(xlCellTypeVisible).Areas.Count
The result is 2,197. That means Excel has to perform the delete rows command 2,197 times to delete all the filtered rows. If there are formulas that are dependent on that range then it will have to update the range references as well. Imagine how long it would take if we had to do that manually… 🙂
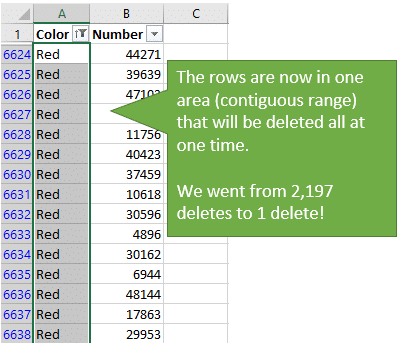
Now if we sort the data first by the color column, then filter for Red only, then delete, the process takes… less than 1 second!
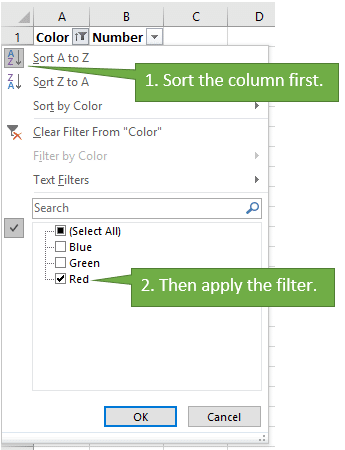
Unless you need an excuse for a coffee break, it's best to sort the column before deleting the rows. We went from 10 seconds to less than 1 second with a simple sort! Woohoo! Don't forget to alert the media (aka boss) that you saved a bunch of time!
The sort puts the visible rows to be deleted in one contiguous range (area). Excel is able to delete the range all at one time, instead of looping through all of the areas in the unsorted range.
If the current sort order of the data is important and you don't want to lose it, then we can add an index column to the data table.
An index column is just a column that contains the row number for each row. This is a hard-coded value.
We can type a 1 in the first row of the data table, then fill the sequence down.
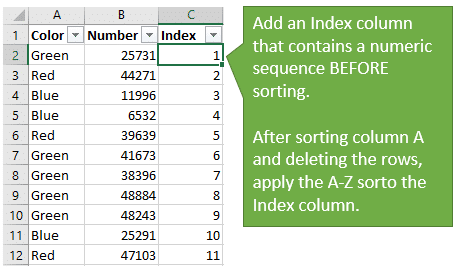
Now with the index column in place, we can sort, filter, and delete the rows. After the deletion, sort the index column in ascending order to get the original sort order back.
Source: excelcampus.com

12/11/2025


