
- Training
- Service
- Promotion
- Schedule
- Testing Center
- News
- Contact
6/25/2020


Bottom Line: Learn to add buttons to the Excel ribbon or Quick Access Toolbar that will run macros when you click on them.
Skill Level: Intermediate
Video Tutorial
Macros are simply pieces of code that automate tasks and procedures. They make things faster and easier and are tools that accomplish specific tasks. But like any tool, they should be kept near at hand so that they can be used right when you need them. One way to make your macros more accessible is by storing them in your Personal Macro Workbook and then creating buttons for them, so that they can run with just a simple click.
Creating buttons for macros basically requires you to customize either the Excel Ribbon or the Quick Access Toolbar. The ribbon is the tabbed menu that is found just above the formula bar. The ribbon is the line of icons found at the very top of the Excel page.
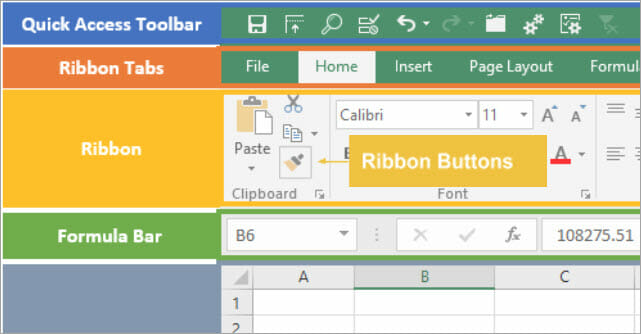
Again, you will most likely want to store the macros for these buttons in your Personal Macro Workbook because that file opens every time you open Excel. Checkout my post & video on the Personal Macro Workbook if you don't have yours setup yet.
To add a button to the ribbon, start by right-clicking anywhere on the ribbon or ribbon tabs. Then select Customize the Ribbon.
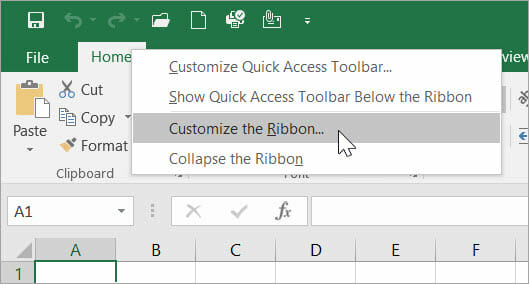
This will open the Excel Options page, and Customize Ribbon should already be highlighted on the left-hand side. In the right-hand side of the Excel Options page, you will see a list of all the tabs that are currently available to you.
We will be making a new tab. To do that, just select the tab that you want your new tab to come after. Then hit the button that says New Tab.
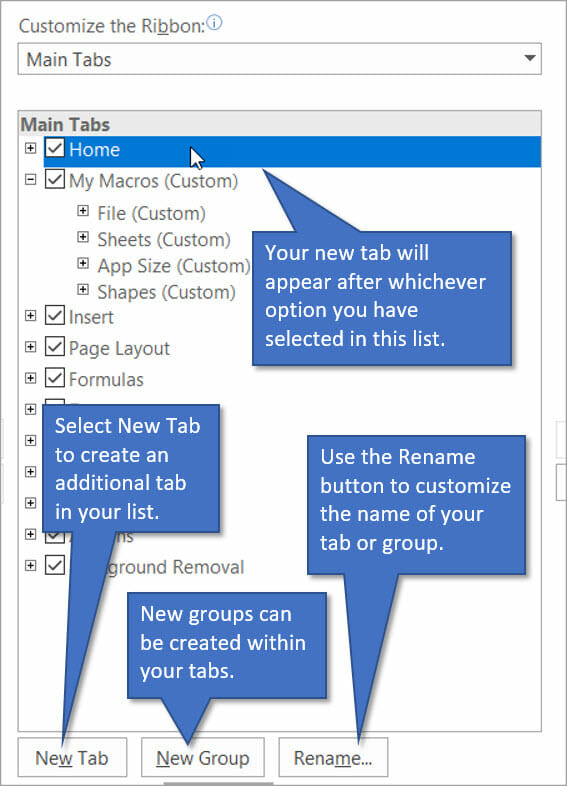
Within each tab, you can have subcategories called groups. You'll be able to place your macro buttons in groups according to their function. After you've added your new tab and/or group you can change the name of it using the Rename button.
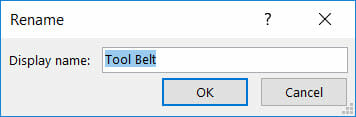
When you choose the Rename option a small window appears allowing you to type in the name of the new tab or group. In my example, I am naming my new tab “Tool Belt.”
Once you've named both your new tab and the group or groups underneath the new tab, you can start adding buttons that correspond with your existing macros. To view the macros that are available, select Macros from the drop-down list under Choose commands from.
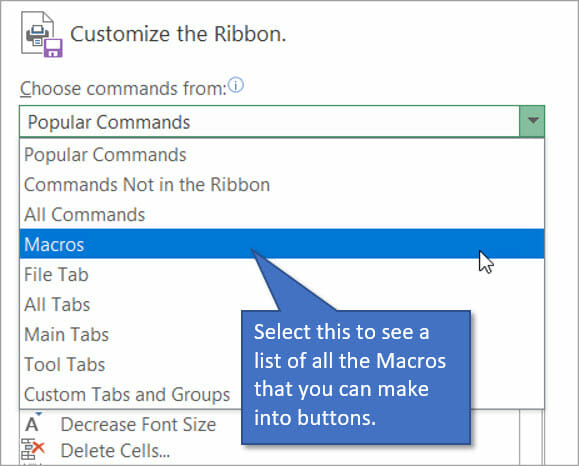
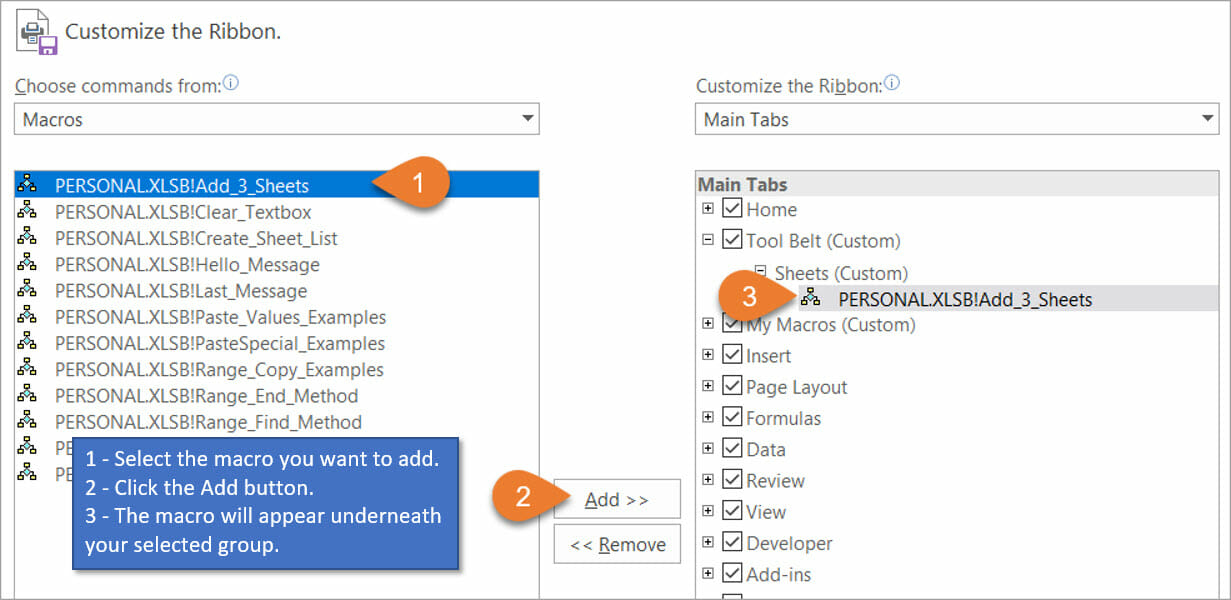
Choose the macro that you want to add as a button to your tab. Then hit Add. You will see it added to the list on the right.
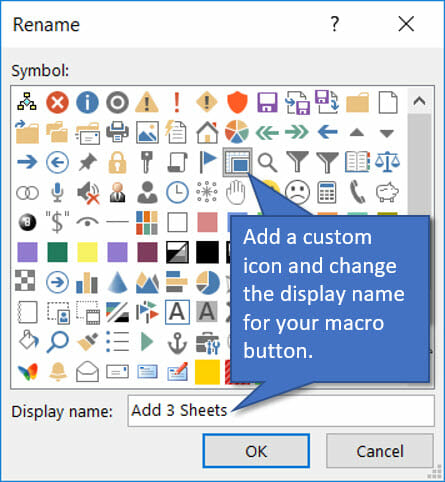
Rename the macro so that the file name is not displayed on the button, but whatever title you choose instead. You can also further customize the button by choosing from the icon menu. This menu is presented to you when you click the Rename button.
Unfortunately we are limited to this small set of icons. If you want to use a custom image then you will have to create a ribbon by customizing the Ribbon XML. I cover this technique in detail in my VBA Pro Course, which is now part of our Elevate Excel Training Program.
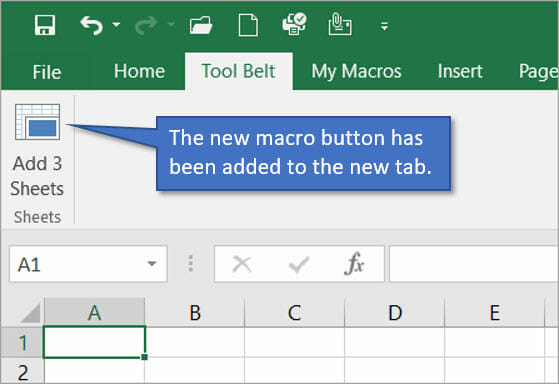
And that's it! The new button has been added to the Tool Belt tab. It runs the macro called Add 3 Sheets when pressed. Here's how it looks on the ribbon:
The process for adding the macro button to the Quick Access Toolbar is essentially the same. However, instead of choosing Customize the Ribbon after right-clicking on the ribbon, choose Customize the Quick Access Toolbar. This option is highlighted on the menu below.
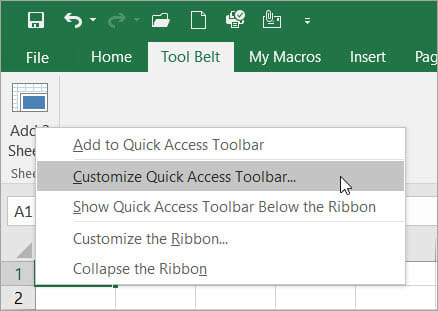
If you already have a button for the macro that you want to add to the Quick Access Toolbar, you can right-click directly on it. Then choose Add to Quick Access Toolbar (the first option in the menu shown above).
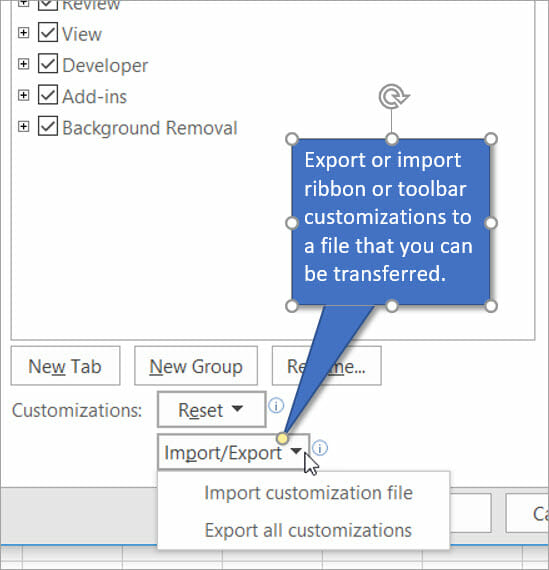
If you would like to transfer your customized buttons and tabs to another computer or user, you can do so easily. In the Excel Options window, there is a button on the bottom that says Import/Export. If you choose Export all customizations, they will be placed in a UI file. You will be prompted to save this file to your computer. If you choose the Import customization file option, a browsing window will appear. This will allow you to indicate which file you want to import.
Now that you've created buttons that run your macros, it's important that you don't accidentally hit one of them and inadvertently mess up your worksheet. To guard against this we can create a Yes/No pop-up box just to verify your intentions before proceeding.
Source: Excel Campus

12/11/2025


