
- Training
- Service
- Promotion
- Schedule
- Testing Center
- News
- Contact
6/30/2020


To create a form in Word that others can fill out, start with a template or document and add content controls. Content controls include things like check boxes, text boxes, date pickers, and drop-down lists. If you’re familiar with databases, these content controls can even be linked to data.
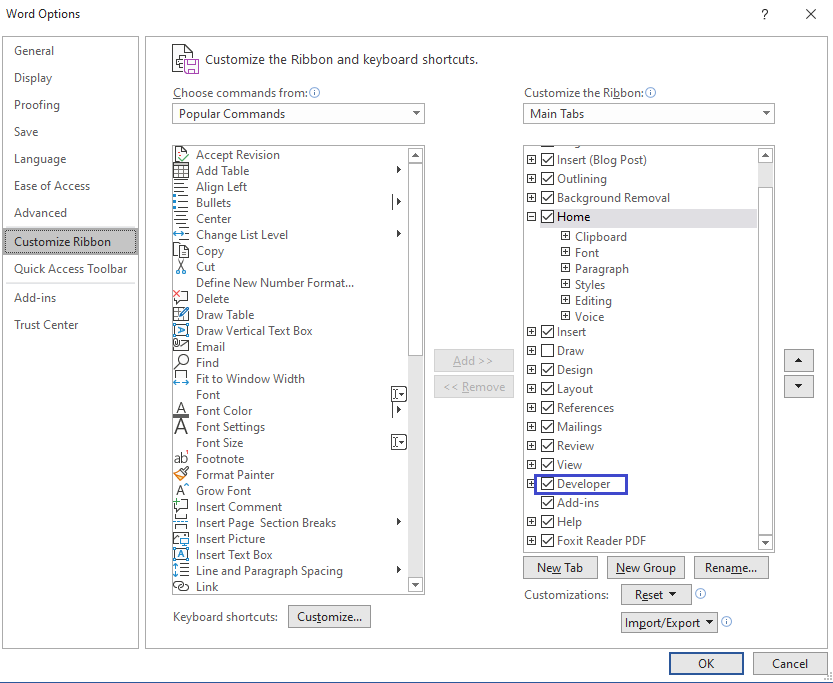
Show the Developer tab
The Developer tab isn't displayed by default, but you can add it to the ribbon.
After you show the tab, the Developer tab stays visible, unless you clear the check box or have to reinstall a Microsoft Office program.
Open a template or a blank document on which to base the form
To save time, start with a form template or start from scratch with a blank template.
Add content to the form
Go to Developer, and then choose the controls that you want to add to the document or form. To remove a content control, select the control and press Delete. You can set properties on controls once inserted.
Note: You can print a form that was created using content controls, but the boxes around the content controls will not print.
In a rich text content control, users can format text as bold or italic, and they can type multiple paragraphs. If you want to limit what users add, insert the plain text content control.
 or Plain Text Content Control
  .
.A picture control is often used for templates, but you can also add a picture control to a form.
 .
.Use building block controls when you want people to choose a specific block of text. For example, building block controls are helpful when you need to add different boilerplate text depending on the contract’s specific requirements. You can create rich text content controls for each version of the boilerplate text, and then you can use a building block control as the container for the rich text content controls.
 (or Building Block Content Control).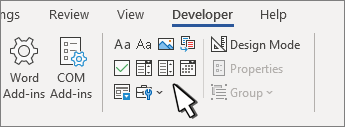
In a combo box, users can select from a list of choices that you provide or they can type in their own information. In a drop-down list, users can only select from the list of choices.
 or Drop-Down List Content Control
  .
.Repeat this step until all of the choices are in the drop-down list.
Note: If you select the Contents cannot be edited check box, users won’t be able to click a choice.
 .
. .
.Legacy form controls are for compatibility with older versions of Word and consist of legacy form and Active X controls.
 drop-down.
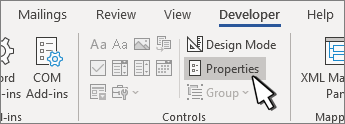
Set or change properties for content controls
Each content control has properties that you can set or change. For example, the Date Picker control offers options for the format you want to use to display the date.
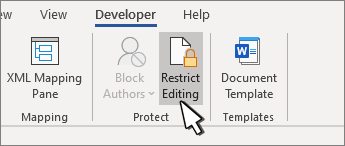
Add protection to a form
If you want to limit how much others can edit or format a form, use the Restrict Editing command:
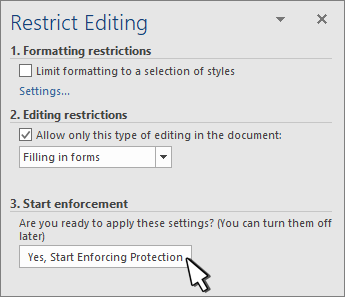
Advanced Tip:
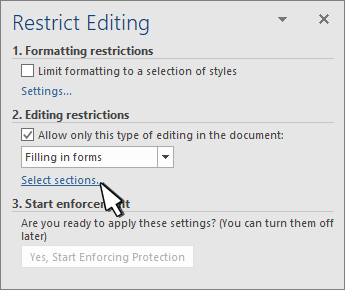
If you want to protect only parts of the document, separate the document into sections and only protect the sections you want.
To do this, choose Select Sections in the Restrict Editing panel. For more info on sections, see Insert a section break.

12/11/2025


