
- Training
- Service
- Promotion
- Schedule
- Testing Center
- News
- Contact
7/9/2021


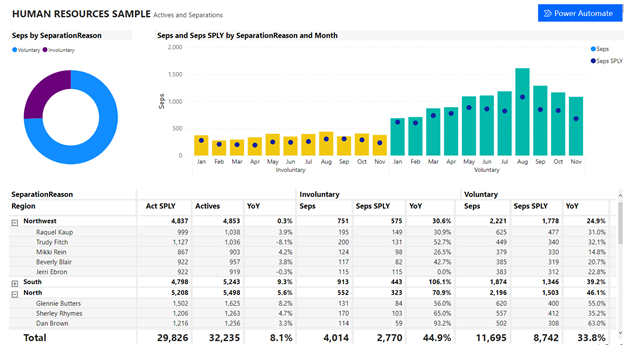
To get started, you download the visual from AppSource and import it to your Power BI report. You need to download it to every report you want to use it in. It's not added the Power BI Desktop.
1. In the Visualizations pane select More options (...) > Get more visuals.

2. In AppSource, search for Power Automate > Add.
.png)
When it’s successfully imported, you see the Power Automate icon in the Visualization pane.

1. Select the Power Automate icon.
It automatically gets added to your current report page, with getting started instructions.
2. Scroll, resize the visual, or select the Focus mode icon to see all the instructions.
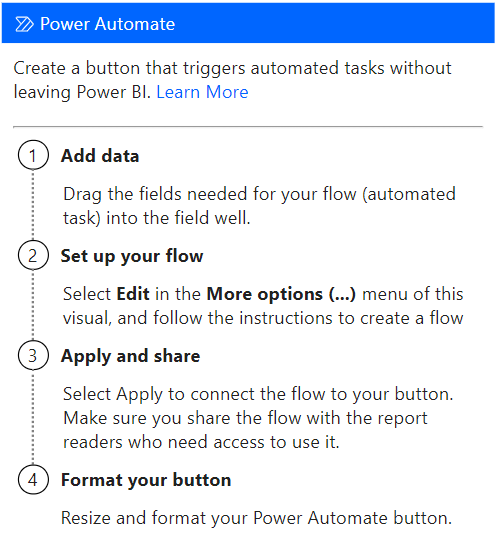
3. After you’ve reviewed the instructions, resize the button and place it where you’d like on the report.
1. With the flow selected, add any data fields to the Power Automate Data region, to be used as dynamic inputs to the flow.

2. Select More options (...) > Edit to configure the button:

3. In the edit mode of the visual, you either select an existing flow to apply to the button, or create a new flow to be applied to the button.
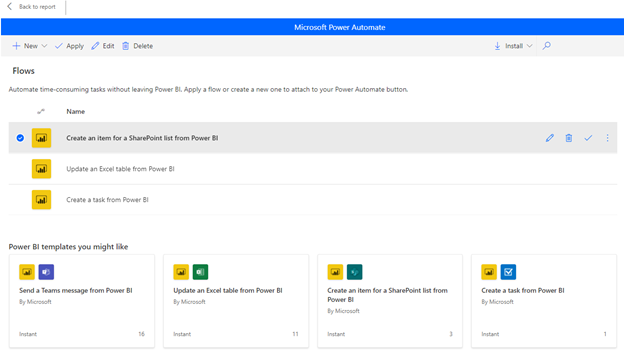
4. You can start from scratch or start with one of the built-in templates as an example. To start from scratch, select New > Instant cloud flow:

5. Select New step.
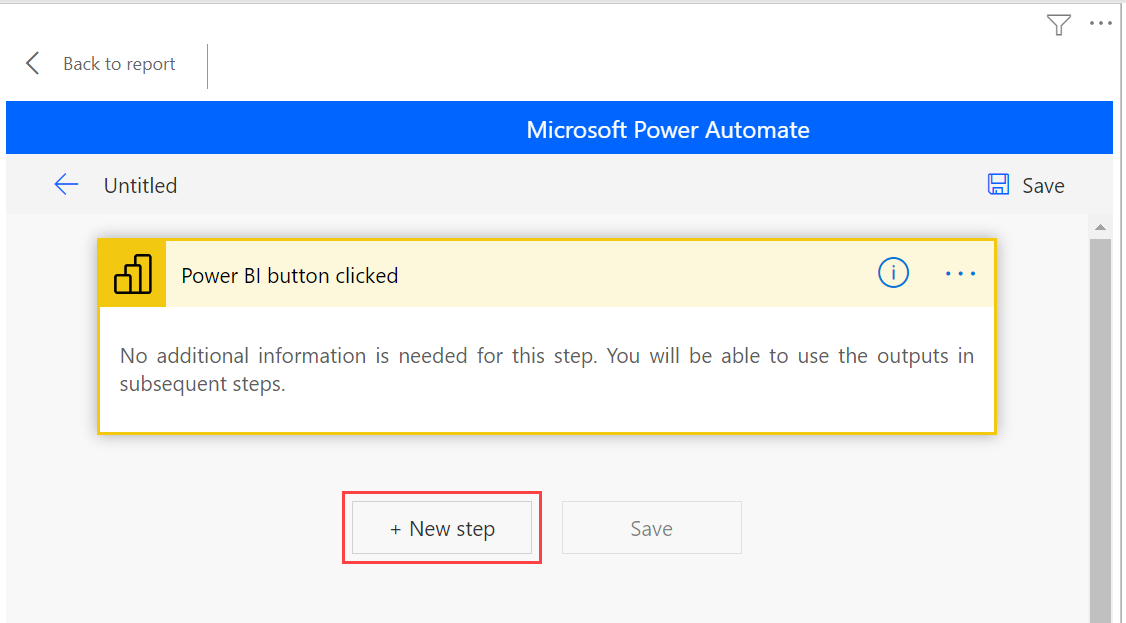
6. Here, you can choose a subsequent action or specify a Control if you want to specify additional logic to determine the subsequent action.

7. Optionally, you can reference the data field(s) as dynamic content if you want the flow to be data contextual. This example uses the Region data field to create an item in a SharePoint list. Based on the end-user’s selection, Region could have multiple values or just one.

8. After you’ve configured your flow logic, you can name the flow and select Save.
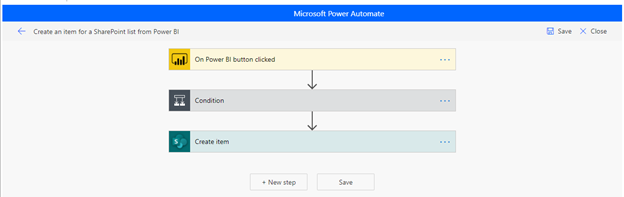
9. Select the arrow button to go to the Details page of the flow you just created:

Here's the Details page for a saved flow:
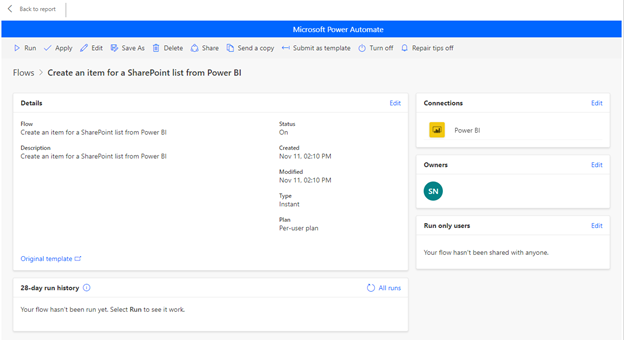
10. Select the Apply button  to attach the flow you’ve created to your button.
Optionally, you can change the button text, font color, font size, or fill color of the button. These options along with other settings are available in the Format pane:
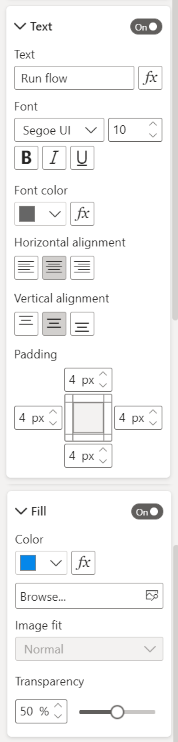
After you have applied a flow to the button, we recommend testing it before you share the flow with others. These Power BI flows can only run in the context of a Power BI report. You can't run these flows in a Power Automate web app or elsewhere.
If your flow is data contextual, you'll want to test how the filter selections in the report impact the flow outcome.
1. To test the flow in edit mode of the report, select Back to report, then press Ctrl while you select the button to run the flow.

The button text indicates that the flow has been triggered.
2. To check if the flow has run successfully, select the More commands (...) menu > Details in the flow that has been triggered:

3. On the Details page, you can see the run history and status for the flow:
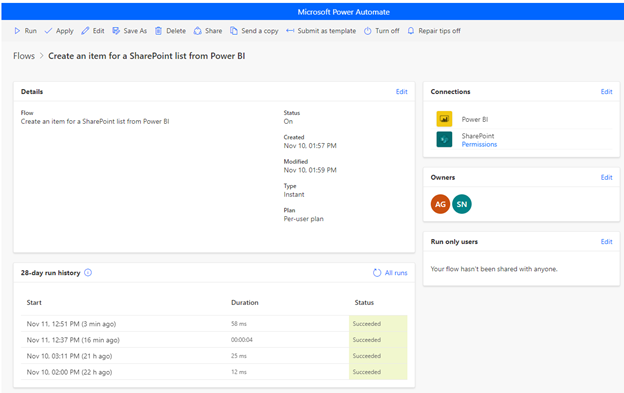
When the flow is running successfully, you can share it with your report readers.
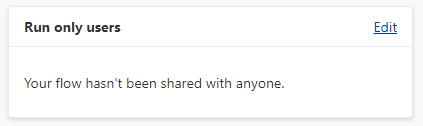
1. Select Edit in the Run only users section:
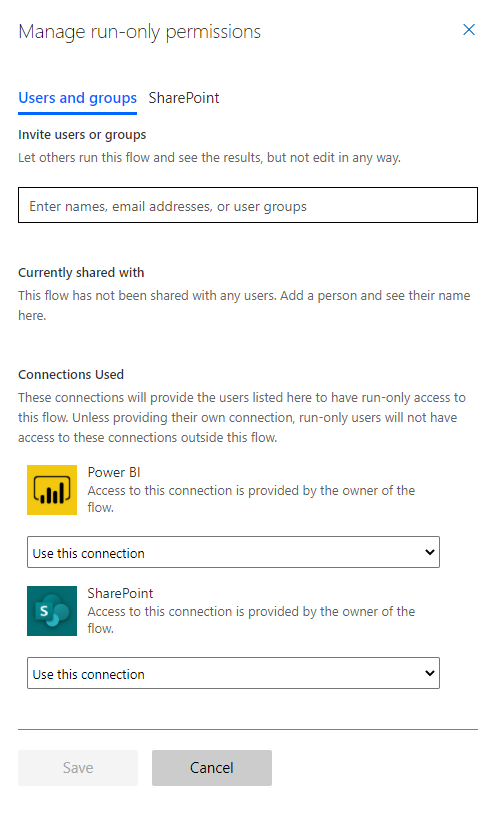
2. Specify which users or groups you want to give run access to:
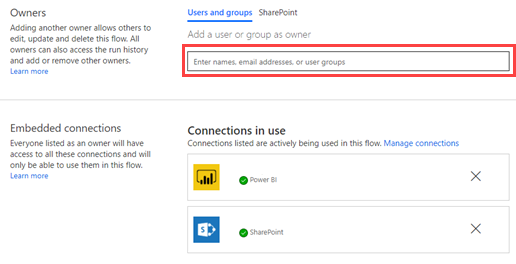
Alternatively, you can give any users edit access to the flow, not just run permissions.
1. Select Share  , and specify the users or groups that you want to add as an owner:
Source: docs.microsoft.com
See more:

12/11/2025


